
Pack for the Camping Route, Weather, and Exit
Pack shelter, sleep, clothing, food, water, light, health, and cleanup as working systems, then subtract only what the campsite truly supplies.
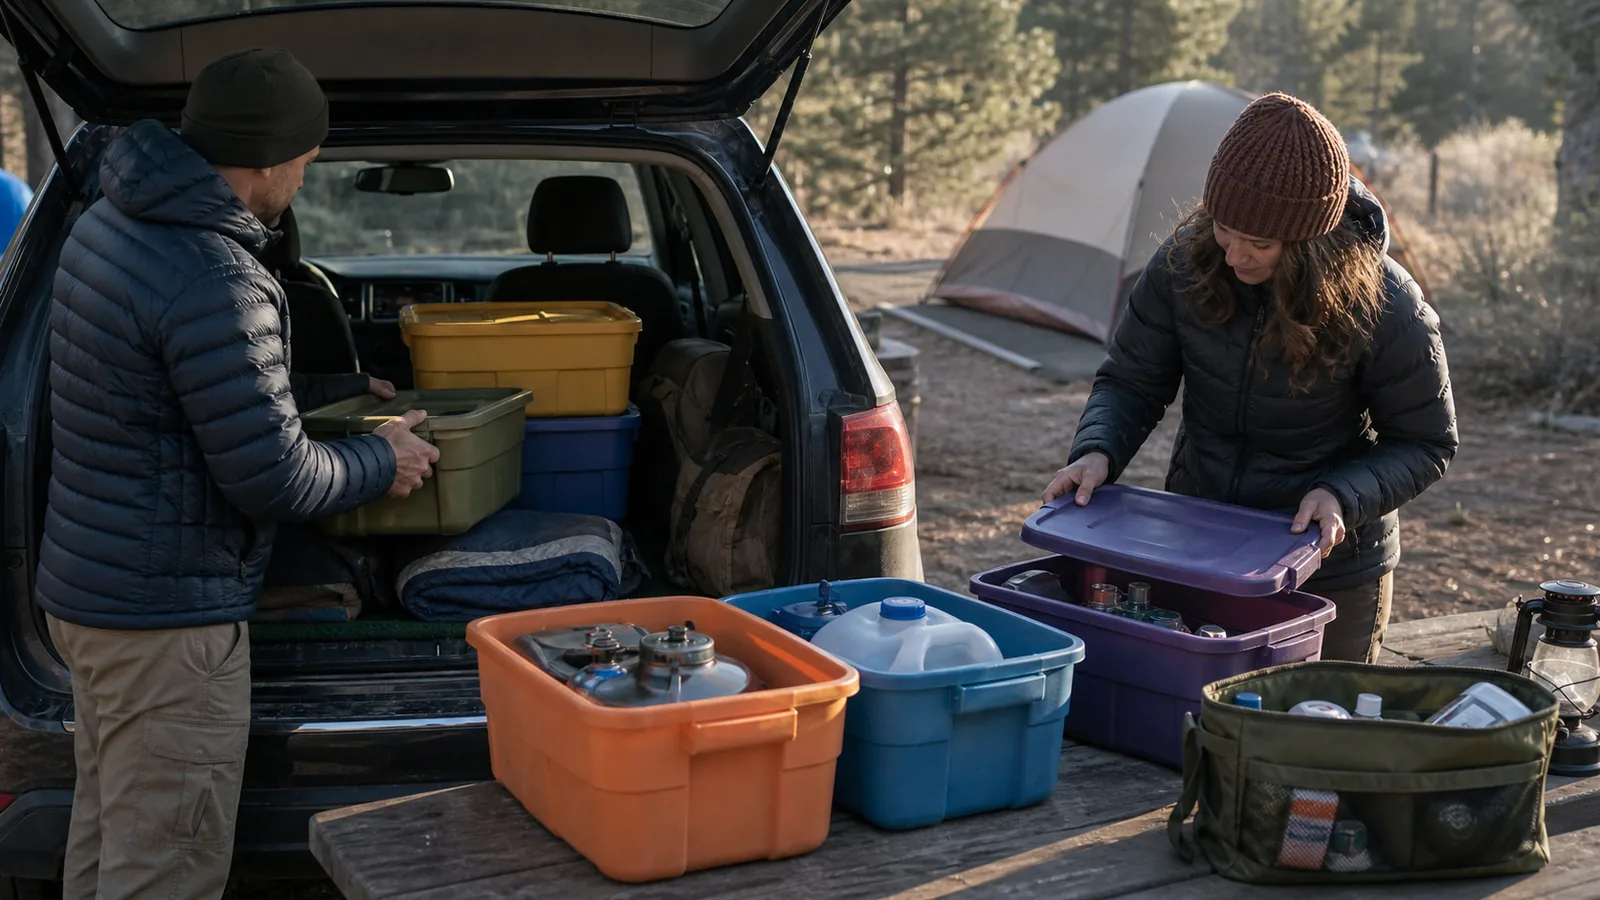
Pack for camping by checking the site first, then covering seven functions: shelter, sleep, clothing, food and water, light and power, health and hygiene, and cleanup. A useful list names every dependent part and who carries shared equipment.
What you pack for camping depends on the campsite. Vehicle access, potable water, toilets, food lockers, fire restrictions, electrical service, weather, and trip length can each add or remove equipment.
Start with functions instead of a store aisle. Your load needs a working shelter, a warm enough sleep system, suitable clothing, safe food and water, reliable light, personal health supplies, and a way to clean and leave the site.
Pack complete systems. The tent bag, stove, or first-aid pouch is only useful when every dependent part is present and usable.
The campsite decides half the packing list
Open the current campground page and reservation confirmation. Record whether water is potable and operating, whether toilets supply paper, whether food lockers are provided, and whether vehicles remain beside the site.
Check fire rules separately because a fire ring does not prove that fires are currently allowed.
Access changes volume.
Car camping can support rigid bins, a cooler, extra water, chairs, and a larger shelter. A walk-in site may require several carries, while a remote overnight turns the question into a backpacking packing list.
The forecast sets the clothing and sleep range. Use the expected overnight low, precipitation, wind, sun exposure, and daily temperature swing.
Check close to departure and keep a smaller plan available when the conditions exceed the group's equipment or experience.
The broader camping activity includes developed campgrounds, walk-in sites, dispersed areas, and carried camps. The equipment list must name which version you are doing because access and facilities change the volume, storage method, and acceptable backup.
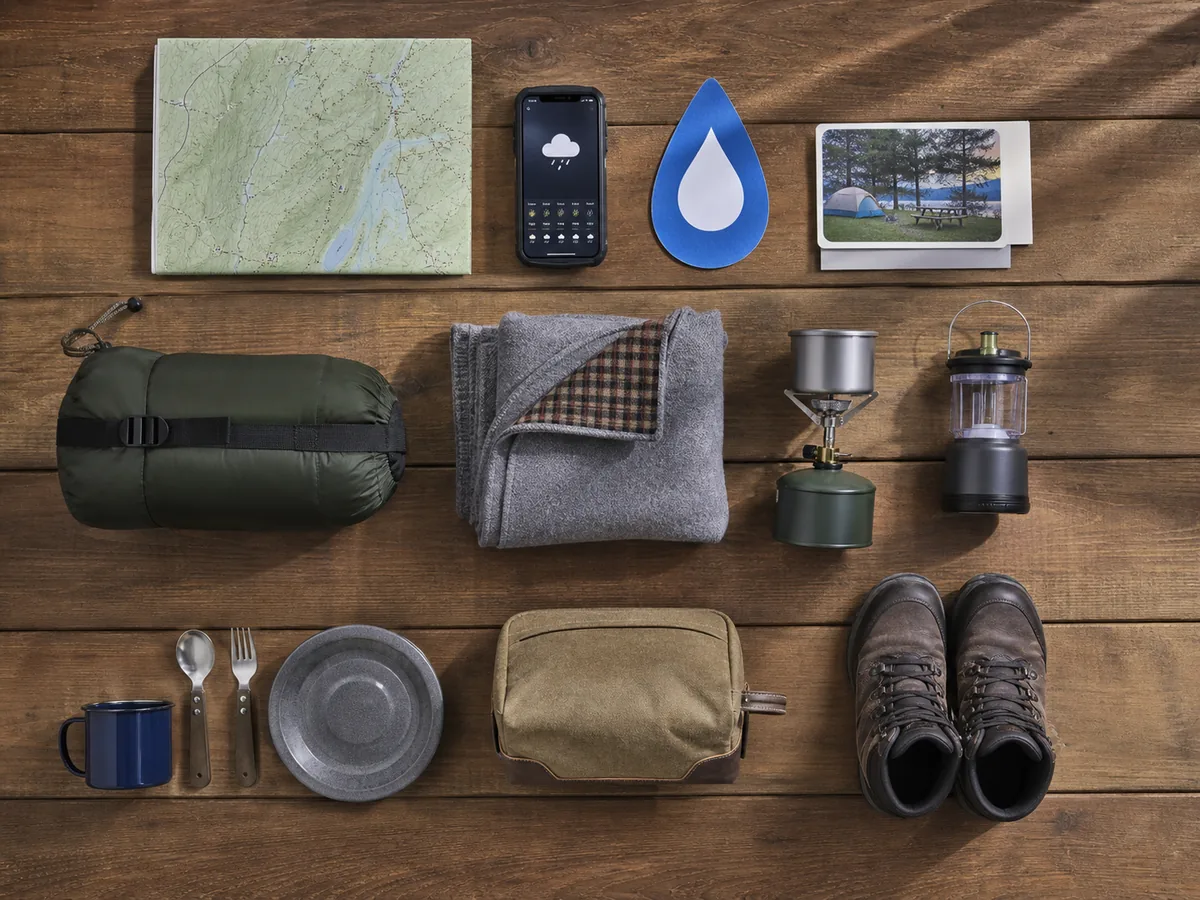
Duration changes consumables rather than every durable item. A second night usually adds food, water or treatment capacity, fuel, hygiene supplies, and perhaps clothing.
It does not require a second tent or duplicate stove unless the group has deliberately chosen redundancy for a specific consequence.
The first camping plan locks the people, nights, access, and rules before final packing. Otherwise the list will keep growing around facts that have not been decided.
Site facts subtract gear only when the facility is confirmed and operating.
What makes a complete tent system?
Pack the tent body, compatible poles, rainfly, stakes, guylines, and any required setup tool. Add the footprint if the shelter uses one, but ensure it will not extend beyond the floor and collect rain.
- Tent body
- Encloses the sleeping space
- Poles or support
- Creates the designed structure
- Rainfly
- Manages precipitation and exterior condensation
- Stakes and guylines
- Hold shape during a wet-weather shelter setup where permitted
- Ground protection
- Reduces abrasion when correctly sized
- Repair material
- Handles a small fabric pole or cord failure
Check that the packed shelter fits the site pad and the people using it. A two-person label usually means two sleeping positions, not two people plus bulky bags, a large dog, and standing room.
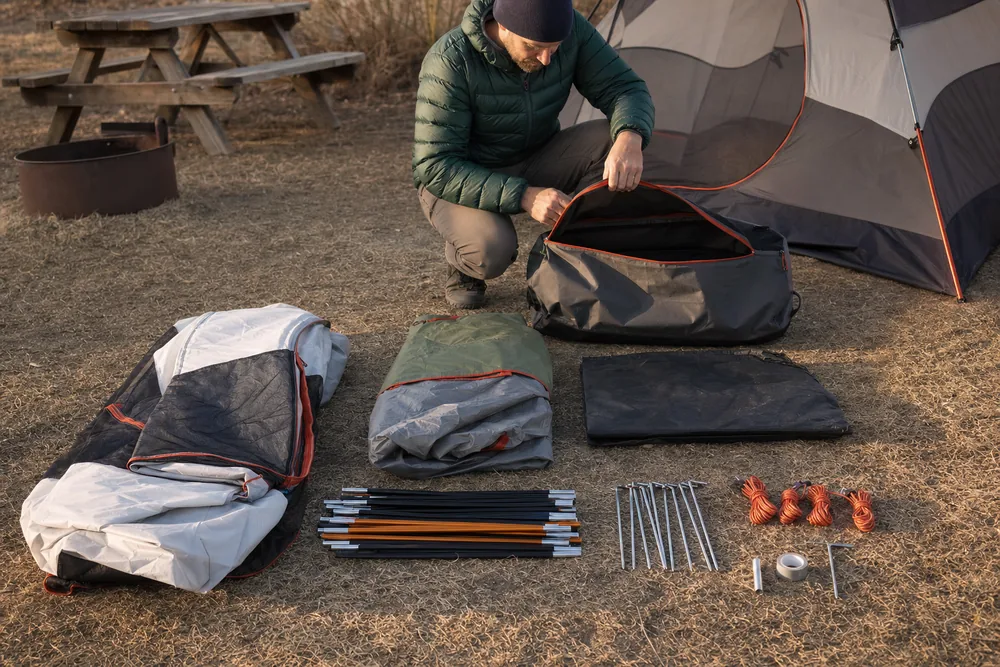
Bring a small repair kit suited to the shelter.
Useful items may include compatible pole splint material, fabric repair tape, spare cord, and the tool needed for the chosen stakes. The repair should match a failure you can reasonably correct, not every imaginable break.
Pitch the entire shelter at home. Count components while taking it down and put them directly into the final shelter bag.
A written line that says “tent” cannot catch poles left in a garage.
Pack the assembly, not the product name.
How do you pack a complete sleep system?
The pad insulates you from the ground and cushions pressure. The bag or quilt traps air around the body.
Dry sleep clothing protects insulation from daytime moisture, while shelter ventilation helps moisture leave instead of collecting on fabric.
| Job | Pack | Proof |
|---|---|---|
| Ground insulation | Sleeping pad suited to expected conditions | Holds air and fits the sleeper |
| Loft around the body | Sleeping bag or quilt | Dry correct size and tested near the expected range |
| Dry reserve | Base layer socks and optional hat | Sealed away from wet daytime gear |
| Comfort | Pillow or improvised support | Does not disrupt the pad or bag fit |
| Moisture control | Shelter with usable vents | Vents work with the rainfly installed |
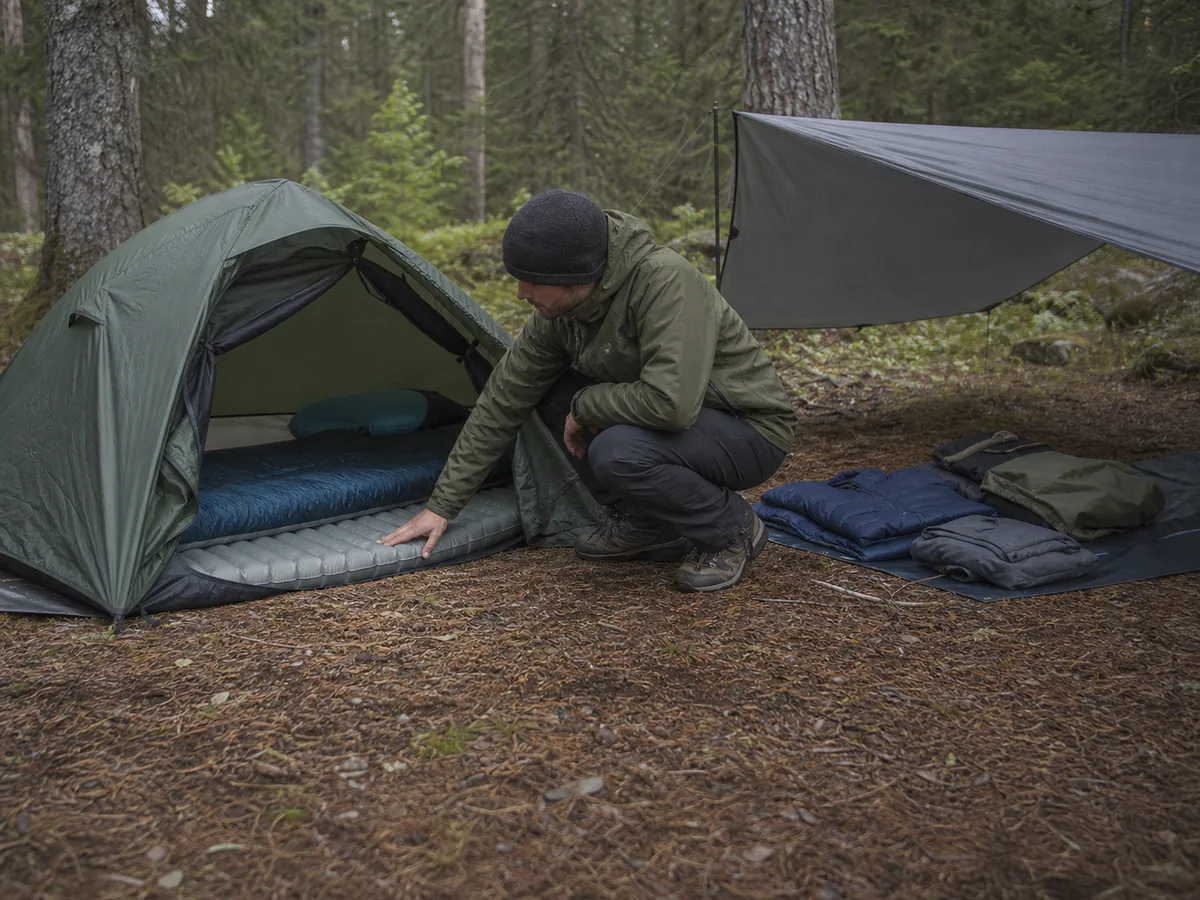
Use manufacturer temperature information as a comparison, not a guarantee.
People sleep differently, and the pad, wind, dampness, fatigue, food, and clothing all affect the result. Test the complete system in a low-consequence setting before relying on it farther from home.
Add clothing for the temperature range and camp tasks. Pack a rain layer when precipitation is plausible, sun and insect protection when exposure calls for them, and footwear that remains usable around camp.
Keep the dry sleep layer separate from clothing worn while cooking or collecting moisture.
Build outfits by phase rather than by day.
Arrival and setup may be warm work, the evening may require insulation while standing, and the overnight needs a protected dry layer. A second shirt that performs the same job is less useful than a rain shell or warm layer that closes a different weather gap.
For winter camping conditions, the list also needs a liquid-water strategy, cold-tested fuel plan, protected batteries, suitable ground insulation, spare hand protection, and a morning exit that remains usable after snow.
The beginner camping sequence explains when to build and check this system during the first evening.
Ground, loft, dryness, and ventilation need separate answers.
How do food-storage rules change the camp kitchen?
Read the local food-storage requirement before choosing containers.
A campground may direct visitors to use a provided locker, a locked hard-sided vehicle, or a specified wildlife-resistant container. Food, trash, toiletries, pet food, cooking oil, and used dishes may all fall under scented-item rules.
Pack enough drinking and cooking water unless a current official source confirms potable water at the site. If you plan to collect natural water, bring an appropriate treatment method and the skill to use it.
The water carry calculation can help separate drinking needs from cooking and cleaning volume.
For cooking, pack the stove, correct fuel, ignition, stable cookware, heat-safe handling tool, eating utensils, and a no-cook fallback. Add a cooler only when the menu requires cold food and you can keep it at a safe temperature.
Keep raw ingredients separated and prevent meltwater from soaking unprotected food.
Cleanup needs its own small system.
Bring a basin or method allowed at the site, minimal soap where permitted, a scraper, drying cloth, trash bags, and a way to strain or dispose of wastewater under local instructions. Never assume a toilet, water source, or storm drain accepts dishwater.
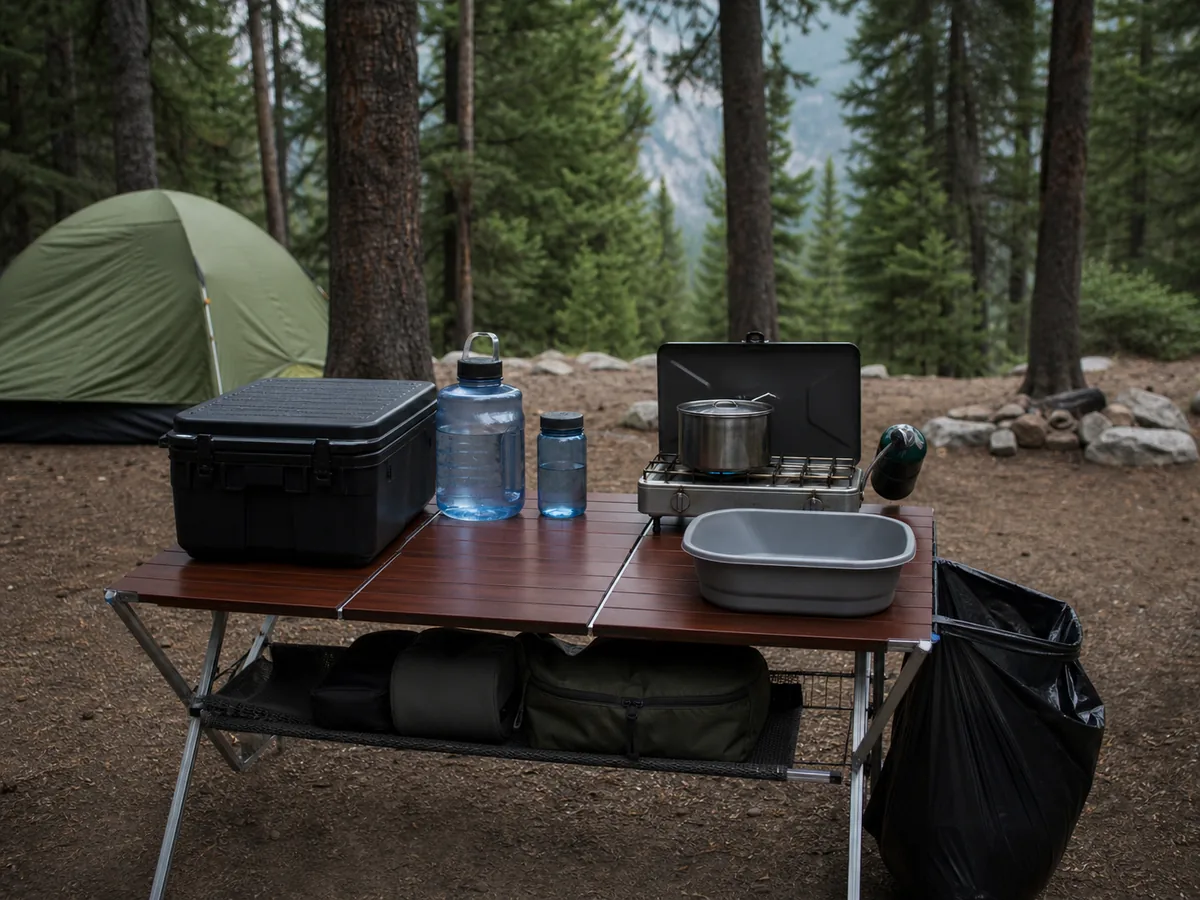
Pack fire equipment only if a fire is legal and appropriate. Basic campfire safety still requires water, attention, and a cold extinguishment.
Clothing and the sleep system must provide warmth without depending on flame.
Storage comes before recipes because it decides what food can remain safely at camp.
What clothing covers movement, camp, and sleep?
Pack clothing for three different jobs. Movement creates heat and sweat, camp reduces activity, and sleep needs a dry recovery layer that normal chores cannot soak.
Start with the current forecast, expected overnight low, wind, rain chance, sun exposure, and the amount of time people will sit still. Check the whole arrival and departure window because the coldest or wettest hour may occur while breaking camp.
For movement, choose clothing that permits normal steps, bending, and setup work without overheating. A shirt or base layer should dry in the expected conditions, while pants or shorts need to handle the site surface, insects, sun, and temperature.
Bring insulation for the stationary evening, not only for the walk from the vehicle. A person who feels warm while unloading can cool quickly after dinner when activity drops and wind reaches the site.
Use a weather layer that fits over the movement and insulation layers without stopping normal arm movement. Test the hood, cuffs, zipper, and hem before packing so rain protection does not fail when both hands are occupied.
Movement and camp need different layers before the dry recovery set is opened.
One set of clothing stays dry for sleep only
Keep one complete sleep set dry. Seal the base layer, socks, and any sleep hat or required insulation away from wet setup clothing, towels, and footwear.
Footwear needs a campsite job too. The main pair should suit the approach and ground, while dry camp footwear is useful only when it stays secure, protects the foot adequately, and does not replace required walking support.
Pack spare socks according to moisture and trip length, not as a random number. One dry pair reserved for sleep can matter more than several pairs stored beside a leaking water container.
Add sun, insect, and cold protection that matches the place. A brim, warm hat, gloves, neck protection, or insect head net earns space when the forecast, season, or local conditions make that function likely.
Avoid packing every garment as a separate backup.
Build combinations instead. One movement layer, one insulating layer, one weather layer, and one protected sleep set can cover more changes than several similar shirts with no rain or cold protection.
Run the clothing check by person. Children, older adults, people using medication, and anyone who gets cold easily may need different insulation or sun protection even when the group shares one forecast.
Have each person put on the full cold-and-rain combination. Confirm that footwear still fits with the chosen socks, sleeves allow setup work, the hood does not block vision, and the dry sleep set remains sealed after the test.
Pack clothing by the hour it must handle. The active afternoon, stationary evening, wet bathroom trip, cold morning, and dry sleep period can require different combinations from the same small system.
Small tools keep the big systems running
Every person should have a headlamp or reliable light they can reach after dark. Test it, check the controls, and pack spare power where cold, rain, or a loose bin cannot disable the entire supply.
Carry a first-aid kit sized to the group and activities, plus personal medication. Add sun protection, insect protection, toilet paper when facilities do not guarantee it, hand cleaning supplies, menstrual products, and any item a person needs to sleep or function safely.
Open the kit instead of assuming the zipper proves readiness. Replace expired or damaged supplies, add blister care when walking is planned, and make sure another adult knows where personal emergency medication is kept.
A list cannot prove that the group can use an unfamiliar tool.
Cold, wet behavior changes can be more important than a missing comfort item. Keep the hypothermia warning signs accessible to the group when the forecast includes cool rain, wind, or freezing conditions.
Light and power
Headlamps spare power charging cable and protected battery storage.
Navigation and contact
Campground map offline directions phone and the local emergency contact.
First aid and medication
Supplies the group can use plus individual prescriptions and allergy needs.
Repair
Tape cord multitool and patches selected for the equipment actually carried.
Hygiene
Hand cleaning toilet supplies personal care and a legal wastewater method.
Weather protection
Rain sun insects and a dry change matched to the current forecast.
A simple printed or saved campground map helps after dark. Download critical directions and reservation details before leaving service.
The map does not need to turn a defined campground into a navigation expedition, but it should show the site, toilets, water, exits, and host location.
Do not let gadgets displace the basic function.
A lantern does not replace a personal headlamp. A phone does not replace required medication, dry insulation, or an external trip contact.
Support the failure you can name. Small tools earn space by keeping a larger system usable.
Who should carry each shared camping item?
Shared equipment is often missed because everyone assumes someone else packed it. Name one carrier for the shelter, poles, stove, fuel, cooler, water container, first-aid kit, repair kit, and reservation documents.
- Every person has personal clothing sleep gear light medication and eating items.
- One named person carries each shared item.
- Dependent parts travel together or their separation is recorded.
- The vehicle location of first aid water food and shelter is known.
- The first items needed at arrival are not buried under optional gear.
- Keys documents and checkout information have protected locations.
Duplicates can be useful when one failure would end the trip, but choose them deliberately. Two random knives do not solve a missing tent pole.
A second ignition method may solve a known stove or fire-lighting dependency when flame is permitted.
Vehicle organization is part of the assignment.
Shelter and rain layers should remain reachable when precipitation begins at arrival. Food storage should not require unloading sleep gear into rain.
First aid and water should never sit beneath chairs and optional recreation equipment.
Label bins by function rather than by a vague word such as “camp.” Shelter repair, kitchen, food, sleep, and personal items should have locations the whole group understands. Clear labels shorten a wet arrival and help a second person find medication, light, or a missing connector without emptying the vehicle.
Name the carrier and location before closing the vehicle.
How do you test camping gear before loading the vehicle?
A route-built packing audit should lay out equipment by system several days before departure. Compare each group with the campsite facts and weather, then remove items only when another item or confirmed facility still performs the job.
- ChooseMatch every campsite requirement and personal need to a specific item or confirmed facility.
- GroupLay out shelter sleep clothing food water light health hygiene repair and cleanup systems.
- TestPitch inflate light cook charge open and repair with the exact dependent parts.
- AssignName the person and vehicle location for every shared item.
- PackPut each item into its final bin bag or pocket and mark it loaded.
- RecheckCompare the finished load with the latest forecast rules water status and group condition.
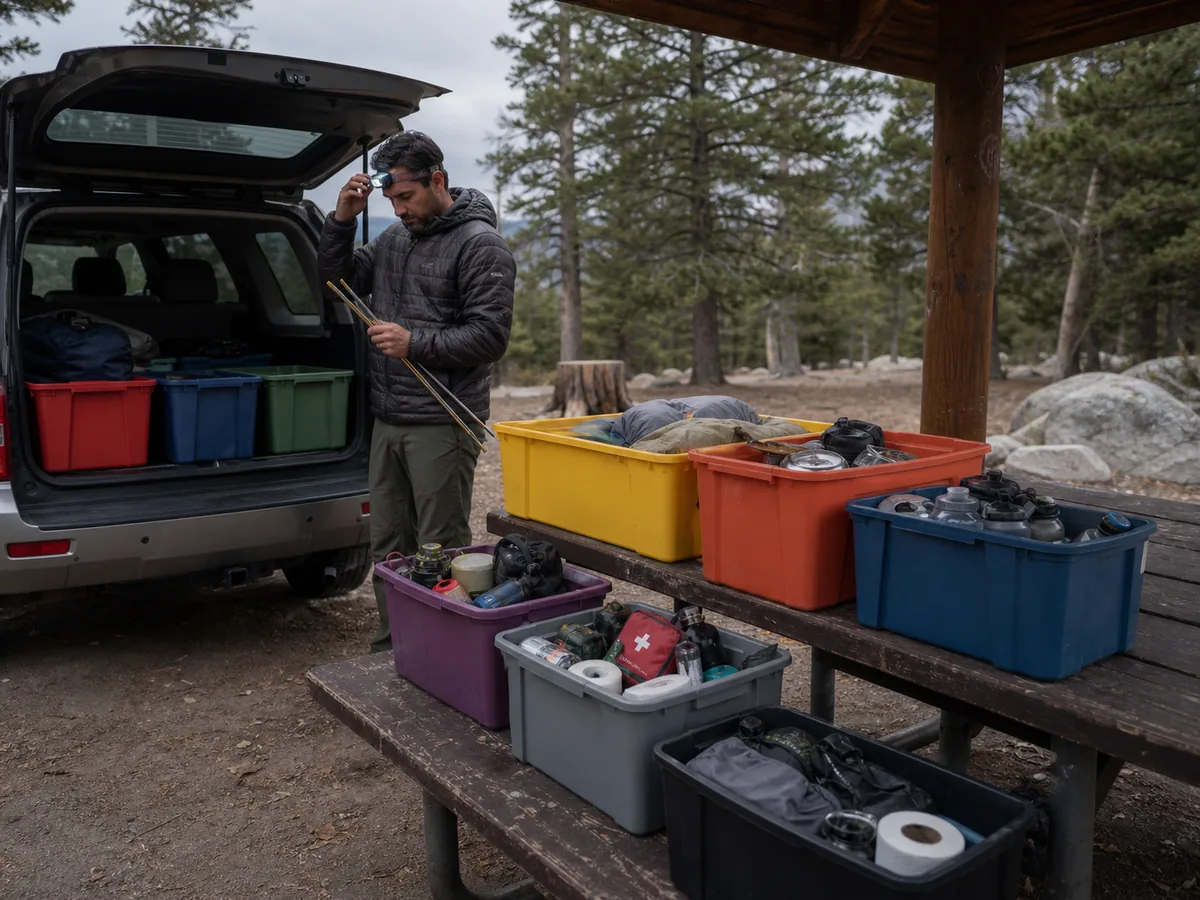
Chosen, tested, and packed must agree before the final current-conditions check.
The vehicle is ready when four things are true
Avoid packing directly from a phone list at the last minute. That process hides whether the item works, whether its fuel or power matches, and whether it has entered the vehicle.
After the trip, record what was used, missing, broken, wet, hard to reach, or unnecessary. Dry and repair equipment before storage.
The camping mistake diagnosis helps connect an awkward night to the earlier packing decision that caused it.
Count consumables before throwing containers away.
Water used, fuel remaining, food returned, trash volume, and battery life give the next trip better quantities. Record the weather and number of people beside those measurements so the numbers retain context.
The final pass checks current facts. A packed list cannot overrule a closed road, failed water system, unsafe forecast, or sick participant.
Sources
The National Park Service groups camping equipment around shelter and bedding, food, storage, water, clothing, safety, and the type of camping: What to Bring.
Its pre-trip guidance explains how setting, season, access, duration, regulations, emergency planning, and equipment tests change what a group needs: Before the Trip.
The NPS also explains food security, camp cleanliness, fire safety, weather exposure, and water planning during a stay: Camping Safely.
Recheck the managing agency close to departure because facilities, water, fires, access, and storage rules can change.
Step by stepPractical steps
- Record current campsite access, facilities, weather, storage, fire, pet, and checkout facts.
- Lay out seven complete systems for shelter, sleep, clothing, food and water, light, health, and cleanup.
- Test every dependent assembly with the actual fuel, power, connector, and repair part.
- Assign one carrier and one vehicle location to each shared item.
- Pack each tested item and compare the finished load with current conditions.
- Record shortages, damage, moisture, and unused equipment after the trip.
AnswersQuestions readers ask
What are the most important things to pack for camping?
Cover complete shelter, sleep, clothing, food and water, light and power, health and hygiene, and cleanup systems. The exact items depend on access, facilities, weather, duration, group needs, and local rules.
What should I pack for one night of car camping?
Pack the same seven systems as a longer trip, but reduce consumables to the people and one overnight. Vehicle access may allow bins, a cooler, chairs, and extra water, but it does not remove shelter, warmth, light, medication, or legal storage needs.
How do I avoid forgetting camping gear?
Use three passes.
Choose a specific item for each function, put it into its final bin or bag, and test the complete assembly. Assign one person to every shared item and recheck current site facts before leaving.
Do I need to bring water to a campground?
Bring enough unless the managing agency currently confirms potable water is operating. Natural water needs an appropriate treatment plan, while cooking and cleaning require volume beyond drinking water.
What camping items should stay together?
Keep dependent parts together when possible. Examples include tent and poles, stove and compatible fuel, pad and repair patch, light and spare power, food and approved storage, and first aid with personal medication.